Scanning 35mm film

Scanning analog 35mm film is almost its own little adventure for me — and sometimes a test of patience. Anyone who shoots film knows the path from negative to finished digital image isn’t always simple. But that’s exactly the charm: it’s slow, deliberate, and requires experience and a bit of technical feel.
Over the years I worked with different scanners. I started with two Nikon Coolscan LS‑2000 units — wonderful machines from the era when Nikon still built professional film scanners. Using a SCSI‑to‑USB adapter, I even ran them on my modern PC. It worked surprisingly well… until the mechanics started failing after about a year each.
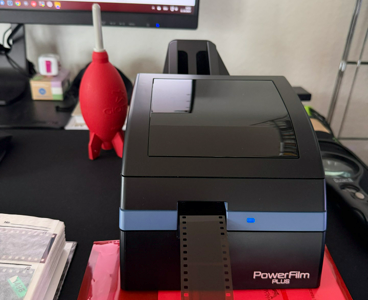
After a longer search I settled on the Pacific Image PowerFilm Plus (imported from the US). It feels like a spiritual successor to the Coolscans: compact, robust, and — crucially for me — capable of batch scanning an entire film strip in one go.
I scan with VueScan, a flexible piece of software that supports nearly any scanner and gives precise control over resolution, color balance and scan mode. I usually scan at 3600 dpi for a good balance between quality and file size.
Of course scanning is never perfectly clean: dust, scratches, slight film curl and color shifts are part of the process. But with patience, a blower, and some light post‑processing, the results can be fantastic.
Overall I’m very happy with the PowerFilm Plus: fast, reliable, and — most importantly — it simply works. No driver battles, no fragile transport mechanisms — just film, scanner, VueScan and a bit of patience.
Saturday, October 18, 2025